Powered By Blogger

Wednesday, 29 December 2010

'My Book Of Spells' Gift Box

I saw this gift box on Helen's fab. Blog It's All Fiddle Fart
and knew I wanted to make one. I set about sourcing the hands, could not find any at my local poundland but luckily Tesco's had them. You get 1 pair of hands and 1 pair of feet, no idea what I am going to do with the feet!,no where as good value as the pound shop but at least I had a hand to get cracking on the gift box. I worked out some measurements - silly me has forgotten to jot them down! - and then set about assembling the book. To secure the hand I punched two tiny holes, corresponding to where there are 2 small type pegs under the hand, used loads of silicone glue to secure, under the hand and behind on the pegs then added a piece of card to hold all in place. I used basic grey mini magnets for the closure, couldn't lay my hands on the velcro I had put by for the project, it had disappeared into some black hole, so the magnets did the job just fine. I have used 'Charmed' font for the wording. I did so enjoy chalking onto the black card. I used a combination of purple, white, mustard and brown. Added a few gems, flourishes and I was done. The gift box was for Christmas, so that my youngest DD could put in some scary sweeties for her older sister Lil, strange gift I know for Christmas, but there was a running theme of all things scary for Lil, she so loves anything scary, so as you can imagine the book of spells was well received.


List of Supplies

Black Card
Gold Card
Krylon Pen
Gems
'Charmed' Font
Chalks
Mariane Designs Flourishes Die
Nail Heads
Basic Grey Magnet Closures


Tuesday, 30 November 2010

'Feeling the Blues'

What an amazing Journey it has been following the Bah Humbug Challenge Blog 'Feeling the Blues' final challenge
I am prety pleased I have managed to reach my goal of managing all of the weekly challenges. A huge thank you to the 'Team' at Bah Humbug :-) Your all amazing :-)
I am afraid I am going to have to post and run - I have a very poorly daddy - he has had a nasty fall while away in Brighton, attending a huge church event. Got dad back home yesterday, Doc. came today and wanted him hospital but dad is not all keen, so ...  She has left all the necessary meds. and I need to stay over/be with him to administer tabs. etc. If things do not improve there will be no question of him not going  he will HAVE to go Hosp. He will also, once Temp. is down he will be going to have an xray on his arm.  Anyway, enough of my woes - here is my card.


Hopefully you can see the beautiful sheen of
the Brilliance Ink used with the gorgeous stamp.


This is Number 5 of the 20 cards I am making for a friend and I
was so pleased as it fitted so nicely for the final  Bah Humbug Challenge
for 2010

Finally an 'arty' shot of the 25th Dec. seal


Carole x


Tuesday, 23 November 2010

Lovely in Lilac

Here is the 1st of the 20 Christmas Cards I have been asked to make for a friend.


I just love this stamp from 'Whiff of Joy' Lizie With Muff
I do think she looks so pretty dressed in 'Lilac' Although I do think I should
of done her jacket in a coordinating colour rather then all Lilac


I recently purchased one of Tim Holtz's On The Edge Dies - 'Ornate' not quite got to grips yet as to how to really use.


I have used Polar White Flower Soft for Lizzies hand muff, neck warmer
and her cute ear muffs


In this instance I made it up as I went along! I embossed some bazzill basics white card with swiss dot CB folder and once I made the edge cut I snipped it off at each end then placed underneath the other swiss dots embossed layer. I 'swished' some Pretty Petunia 'VersaMagic' over the embossing, added
some glitter to the 'on the edge'diecut, obviously did all this before assembling each layer.


I am entering my card into this weeks penultimate challenge at Bah Humbug
I have so much enjoyed taking part every week in all of the challenges set. What an amazing journey it has been. I also very much appreciate all the hard work Ann, Irene and Max put into the challenges as well as all the other stuff they do towards running the blog.  The blog owners are truly wonderful, in every sense of the word. I will certainly be taking part in the Bah Humbug weekly challenges beginning 2011.


A stamp from the Paula Pascual Large Christmas set with CB snowflake
diecuts and Marianne Designs Flourish were used to make
the Christmas Seal/Sentiment
I am entering my card also for the 1st time to the lovely

Totally Gorguss Not So Tradional Challenge


List of Supplies

6x6 Base Card
Whiff of Joy 'Lizzie with Muff'
ProMarkers
Bazzill Basics Card
Patterened Paper - Papermania??
CB Swiss Dots Embossing Folder
Tim Holtz On The Edge Die
Quickutz Cookie Cutter Nesting Dies
CB Snowflake Diecuts
Marianne Designs Flourish Diecuts
Polar White Flowersoft
Lilac Sheer Ribbon
Brads
Glamour Dust
Ultra Fine Glitter
Pretty Petunia VersaMagic


Sunday, 21 November 2010

HandMade Buttons - Makin Clay

I was inspired to make some buttons after seeing a feature in this months 'Craft Stamper' Dec. Issue Craft Stamper


 I havn't used Kars Makin Clay before so wasn't sure what to expect as to ease of use etc. Thankfully, It wasn't too difficult. Once rolled out I Rubber stamped images onto this then used some small cutters to make the 'buttons' Once air dried (approx 24hrs) I coloured the buttons using Perfect Pearls, metallic rub-on. I have left 2 of them 'naked' To seal I used a cheap hair spray and allowed to dry. I made the button cards, I wanted to have something 'bold' hence the vivid colours, I have also have overstamped using versamark and then brushing over with perfect pearls to soften it a little then attached to the card. I have made the buttons as a gift for a crafty friend - I will certainly be having a go with these again.


Craft Stamper has some Vintage sewing ephemera consisting of 3 'button cards'
I may use next time round.

List of Supplies

Kars Makin Clay - Natrual
Range of mini metal cutters
Fancy Pants Clear RS
Tim Holtz RS
Dye InkPads
Versamark 
Perfect Pearls 
Metallic Rub-On
Glue Pad 
Krylon Pen
'Made with Love' Charms
Cheap Hairspray
Needle and Thread 
White Card


Chocs. Away !

I was inspired by Rachel's lovely make of her 'seasonal' box that I just had to have a go myself.
Here is another one of Rachel's fab. 'seasonal' boxes Another 'Seasonal' Box

The most difficult part has been sourcing the chocolates! I finally came across them in my local pound shop. There are 2 'trays' of chocolates in each box.  In theory (if you don't succumb to sampling the second tray) you can make 2 gifts (excl. the materials etc. for the box) for  a mere 50p each.


Comes supplied with 2 'trays' of chocolates

Here is my finished box.


Once I worked out the dimensions of the box it was very quick to make. I used my Cricut to cut a snowflake, added some Brilliance inks and then sprinkled with glamour dust. To package up I will finish off with a tag and tie round some sheer blue ribbon. 
I need to write the dimensions down as a reminder - I worked it all out then forgot to jot it down for when I make more boxes. Brain like a sieve you know!
Thank you Rachel for all your help and Inspiration :-)

List of Supplies

Bazill Basics Card
Scor - Pal
Cricut 'Simply George Cart'
Brilliance Ink
Krylon Pen
Glamour Dust
Gem
And Not Forgetting .. Chocolates


Sunday, 14 November 2010

Money Gift Wallets - Part 2

Here are the remaining three Money Gift Wallets that My likkle Sis. asked me to make for her. They are now with her.
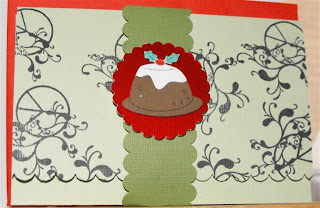
I used This tutorial for the inspiration - Reindeer and Christmas Pud. wallet.
I did though make the mistake on the first one by using a too wide DS tape on the edges, as if anything bigger than a £10.00 note, it will not fit unless folded.


I used this tutorial for inspiration


Supplies List 

Bazzill Basics Card
Chocolate Stardust Card
Red Foil Card
Scor-Pal
Circle Punch (this is used on the inside to make a half circle)
Scalloped Border Punch
Nestabilites
Paula Pascal Clear RS
Basic Grey Clear RS
Rollagraph - Swirl and Stars
Reindeer/Christmas Pud. Die cuts
Zoomz - Rudolph's Nose
Gems
Holographic Embossing Powder
Impress Dye Ink - Blue
Versamark Black Ink
TriPlus FineLine Gel Pens

I am entering the 'Reindeer' Wallet into this weeks
Bah Humbug Rudolph/Reindeer Challenge

Remembrance Sunday - Poppies

A dear friend of my mum's sadly died last October, she was such a lovely lady, and so, so kind and always put others before herself. We very much miss her. She devoted many yrs. to the British Leigion. As today is Remembrance Sunday I thought I would post something poingnant and appropiate.


Faux Suede Flower

I am posting this because I want to pass the info. of the technique over to Helen at
It's All Fiddle Fart  I will add the link to my comment on her blog.
Helen has made a beautiful poppy card for her mum, she then goes onto say

If there was a crafting tool I would like to buy that I don’t think has been invented yet, it would be a “crumpler” – I love the crumpled look, but I’m not sure how to do it properly, I end up screwing things up into a ball over and over again but often risk the paper getting torn ….. come on Tim Holtz invent something for me – I am a damsel who needs to distress!

Anyway, on we go

 A dear crafty friend, Kath really is such a talented crafter and a very kind and generous lady too, used this tutorial to make her beautiful carnations. The tutorial shows you also how to achieve a faux suede effect. Ruffled Carnation Tutorial
I used the technique to make this


I used Bazzill Basics card - I have so far found it the best for ease of
seperating the layers of card as shown in the tutorial

Helen mentions the risk of tearing when screwing the paper/card into a ball, IMHO if this happens, especially so
with the 'faux suede effect' on seperating the layers, it, for me, adds a little more interest to the finished item.


On this flower I added ink to the 'faux suede' layers of the flower to added interest


Wednesday, 10 November 2010

Money Gift Wallets - Part 1


I have been asked by my likkle sis to make her some Money Gift Wallets in readiness for Christmas. I have made 2 of the five she has asked for. The brief is 'Christmas' 'all ages'  I really enjoyed making the tag type money wallet but the second one, well won't be in a rush to make one like it again. I took inspiration from these tutorials
Money Gift Wallet
YouTube Tutorial Money Gift Wallet

Just 3 more to go then I can take them over to her. I hope she will like them.

I am entering the gift wallets into this I hope the ladies of
Bah Humbug Challenge Fancy Folds  will feel it will fit in this weeks challenge.

 There certainly are some stunning creations been entered into the challenge, the DT entries are truly spectacular!


Money Gift Wallet with Curve


The inner of the Money Gift Wallet
 

'Tag' Money Gift Wallet

Supplies List

Red, Chocoalte Brown and white card
Papermania 12 days of Christmas paper
Rollagraph 'Swirl and Stars'
Ancient Page Rollagraph Ink Pad
Paula Pascal Personal Impressions Clear RS set
Gems
Eyelets
Scor-Pal
Silver Thread


Friday, 5 November 2010

It's Just a Number

Here are two cards I have made. Both people are celebrating major Birthdays. A chap who is turning 40 and a lady who is about to celebrate turning 50. The lady is the friend I am visiting in Durham to help celebrate her birthday.
I so enjoyed using acetate on the book mark and card that I decided I would use again. I have used the acetate with the numbers, of which I embossed then coloured with alcohol inks and then again embossed the main piece of acetate for added interest on the card. I used the CB Happy Birthday folder for the embossing. I embossed on the main/base of card with the CB numbers folder. The chaps card I accidently 'debossed' but decided I liked it and so left it.
I have used again on both cards the gorgeous K &Co K'ology papers that Dear Max so very kindly sent me. They really are truly lovely, I especially like the paper emblazened with the word 'Beautiful' of which I used on the 50th card.
I have decided not to add any sentiment as I could not decide, even though I have some beautiful sentiment stamps, making a decision was hard so I came to the conclusion that maybe it is 'meant to be' it was saying 'leave well alone' as when I cannot quite make a decision then I Faff, that is when I head for trouble, and I end up saying to myself 'Why oh why cannot you leave well alone' I am happy to go with these thoughts.


A close of the embossing and numbers

Supplies List

6x6 Base Cards
K&Co K'ology papers
Bazzill Basics Card
Acetate
Alcohol Inks
CB embssing folders
CB number dies
Assorted Brads
Paper flowers
Fluid Chalk
Cosmic Shimmer
Headed Pin
Lace
Scalloped Border Punch
Martha Stewart Fern Frond Punch


Thursday, 4 November 2010

Book Mark with Card

I have made this Book Mark and card using some of the gorgeous crafting goodies sent to me by a dear crafting friend Max They included some sponge blocks for making rainbow backgrounds etc. with alcohol inks as well as some very pretty papers. I have been wanting to use them for sometime now so decided today was the day. I had so much fun making 'rainbow' type patterns using the sponges of which I loaded up with various colours of Alcohol Inks. I also used a little of the gorgeous K'ology papers from K and Co. they really are totally gorgeous.
I have used some acetate and embossed to make a pocket to hold the bookmark. The bookmark was also 'rainbow inked' I then added some more inks, using the sponges, over the embossing.  I have heat embossed a flourish stamped image as well as Cuttlebug embossed onto the bookmark. In the pic. the book mark looks almost quite silver but in reality is is not.


Supplies List
6x6 base card
silver card
Glossy card
alcohol inks with sponge blocks (Thank you Max)
CB embossing folder
CB border die
Acetate
Brads
K and co K'ology papers (Thankyou Max)
Krylon pen
SU Bird punch
Snag 'Em So Tweet clear RS
Paper flower
Fluid Chalk
Cosmic shimmer
Twill Ribbon


Wednesday, 3 November 2010

Glittered Ornament Gift

I have had a few clear glass baubles stored away in readiness for doing something crafty with, I had originally thought about filling with yarn and giving as gifts to my knitting frinds but then I saw this fabulous tutorial Glittered Ornament so decided to have a go.
It was this fab. blog that I follow  that spurred me on to get on and 'do'
It's All Fiddle Fart

This is my finished bauble.

It has been a lot of fun making but also a few not so fun bits along the way. The acetate I have for the lid I think is too thick, 200 gsm and as it is A4 does not allow for the 8 1/2" square required. So I have had to jiggle and snip to fit.
For the ink bit I only have distress reinkers but not knowing what other reinkers are like; as in consistency I have nothing to compare with. You need the patience of a saint for the covering with the ink, and don't be tempted, like me,to make it all cover a bit quicker,to add too much ink. You may end up, like I did, trying to put the remaining ink left back into the bottle and all I ended up with was ink everywhere except in thbottle, so all of it got soaked up onto kitchen paper! I did not have any rub-ons either so have had to improvise with Woodware DS heat resistent adhesive sheet, not sure why they say it is heat resistent, cos when I tried embossing, as suggested on the packaing, it all melted, the sheet, not the embossing powder! So added glamour dust to the DS sheet instead. Not happy with it as am wanting something much whiter, will need to investigate further for next time.
I have added a likkle silver 'made with love' I am very much wishing that the recipient will want to adorn their Christmas tree every yr. with my handcrafted bauble. I had ordered some smaller ones from Hobbycraft but when my parcel from them arrived today there were NO BAUBLEs they say none available It accepted my order and did not state at any time none available nor did they email me to let me know I would be getting them. I am guessing at just £1.99 for 10 that is why they have sold out. Sadly no Hobbycraft near to me so hence ordering online.

A few close up pics.


I am entering this gift into this weeks Bah Humbug Challenge 42 'Presents'

I hope the ladies will feel it fits the theme nicely.

Supplies List
Large Clear Glass Bauble
Tattered Rose Reinker
Extra Fine Glitter (pink)
Woodware DS adhesive sheet
Glamour dust
Silver theread
'Made with Love' Charm
Bazzill Basics Card
Snowflakes Patterend paper (PaperMania)
Clear Acetate
Scalloped Punch

Sunday, 31 October 2010

Craftyhazelnut's Christmas Challenge Blog Candy

I've just received My Mind's Eye signature Christmas glitter book papers by Jen Wilson and I thought I would share some with the winner of this blog candy.

So the winner will receive one of each of the 12" x 12" 18 designs - that's 18 luscious papers.


Wishing you every success Hazel with your new venture starting January 2011 :-)Thank you for the fab. opportunity of being in with a chance of winning such lush candy.

Please take yourself along to Hazel's Christmas Challenge blog to read how can be in with a chance to win some Fab. blog candy, as well as read about her new challenge Blog
craftyhazelnut's christmas challenge Blog

Saturday, 30 October 2010

Birthday Card - Dragonfly

A friends Birthday today :-) I made her card very last minute last night!
I used the 'resist technique' RS onto glossy card, brayering over with ink.
I managed to match up colours on white paper/fabric flowers by dabbing over with green and blue fluid chalks as I didn't have the right colour either in inks or cosmic shimmer or flowers for that matter.


Close up/arty shot of the matched paper/fabric flowers


Close up of the pretty dragonfly by Paperartsy
 Supplies List

6x6 Base Card
Glossy Card
Silver Mirror Card
Papers By Black Market Paper Company 'Lucky n Love'
Versamark Ink
Big and Juicy Ink Pad 'Waterfall'
Fluid Chalks
Nestie labels
Martha Stewart Fern Punch
Cosmic Shimmer Sheer Ribbon
'Pin Head'
Gems
Paper/Fabric Flowers

Capturing the Sunrise

I have been wanting to capture some 'sunrises' or 'misty mornings'  so off I went over a number of days (well early mornings) and was rewarded with the most beautiful sunrises and a misty morning. It certainly made a great start to the day.

As the sunrise happens so quickly I just kept 'clicking' away

'Sunarise in the morning'


As the sun rises the river captures a beautiful reflection


The mist lasted around 10 or so minutes as the sun started to rise


Tuesday, 26 October 2010

Notelet Cards

I have recently made some Notelets cards. These will be added to the camera club cards to help raise funds. I have since lined the 4x4 notelets. I will be packaing them with either a RS paper band or plain raffia.
The pictures used I have taken myself. Next time round I will be embossing the base card, makes all the difference, especially so with photgraphs.


Supplies List

Red base card 4"x4"
Coordinating red card for matt
Square Nesties
Krylon pen
Gems
Photographs


Monday, 25 October 2010

Camera Club Cards

Not much skill in constructing the cards but thought I would show you what I have been making on behalf of the camera club I belong to, to  help raise funds. I have made around 80 or so cards - made over the past few days. I finally finished last night, in readiness for a camera club meet today to package up and label etc. We have a sale in our local church in November. I have just learnt how to emboss onto card using nesties so thought would use on the cards to accenuate the pictures a little more. The photos are taken by a number of camera club members. Mine are the

Robin
Passion Flower
Buddleia
Rose

I am hoping to get time to make some 'notelets' also to sell. We have produced a DVD of our pictures taken since the club started this yr. it is pictures of a 'tour' of our village. We have already sold a good number, we will also have them to sell on our stall, as well as some fabulous CD clocks, photographs are printed onto CDs they are truly wonderful and selling very well also. We owe many thanks to our club organizer and her DH for all their hard work with the tech side of all that went into producing the DVD and the making of the clocks. We are raising money in the hope we can produce a calender next yr. of pics. of our village taken by camera club members.


 My favourite has to be the likkle mushrooms, love the detail. Sorry for the dark pic. IRL it is bright and totally stunning. The person who took the pic. said she placed a background using black card before taking the pic. It really works well and the detail is fabulous! Well done Val :-) The mushrooms were found in her mum's garden.
It has been great fun going round getting the pictures. Thankfully I havn't had the task of resizing/printing etc. I am indeed very pleased with how the embossing has set off the pics. so well. The great thing about doing pics. on cards is that the pictures speak for themselves, so very little needs doing, can can suit many occasions. All the cards have been left 'blank' and labeled as such.

Bah Humbug Challenge 41 'Elegance'

Here is my card for this weeks Bah Humbug Challenge 'Elegance'

This must be my quickest card ever! Took me all of 20 or so minutes to make, must be a record for me!
I have gone for Embossing, as I think it can look so elegant. I have used my new 'Christmas countdown' embossing folder. I saw it used recently on another blog so set about buying it. The card has not turned out quite as I imagined, but time is a bit of a premium this week due to me needing to get cracking on with the cards for my local camera club, I will post about this later, so have taken the decision of 'going with it' I need to think about how I am going to place the sentiment 'countdown to Christmas' so have purposely left it till inspiration hits. My apologies that it is not the best pic. I find it quite hard to get a good pic. of mirror card.


Supplies List

5x5 base card
Countdown To Christmas Embossing Folder
Square Nesties (Have used them also to emboss the base card)
Gold Mirror Card
White Hammer Card
Gems
Gold Sheer Ribbon


Saturday, 23 October 2010

Spinning Yarns - Darwin the Geologist

The girls and I went to a Festival of Ideas event on Thursday evening at one of our local University museums. Sedgewick Museum called 'Spinning Yarns' Textile artist Jenny Langley spoke about her  "dream commission" - interpreting Charles Darwin's travels and discoveries into a tactile story rug. You can read and see pictures of the mat here Darwin the Geologist
It was truly wonderful in hearing how Jenny Langley told us of the inspiration and how she made the totally amazing story mat. The pictures on the blog no way reflect how beautiful it is in real life, or how big it is. After the event we also got to see her 'city and guilds in textiles' work she did back in 2002 - We were indeed very impressed with her stunning work. Her major piece was inspired by 'Giants Causeway' Then we just drooled, not literally, over very large scrapbooks featuring her interpretation in textile of our local botanical gardens - Just stunning, and so tactile with it.
Hope you will enjoy reading a little about the project/event, as much as we enjoyed meeting Jenny and hearing how the mat evolved over time.
Here are a couple of pics. that will hopefully give you a better feel of the work and a close up  showing a little of the amazing stitching.